
RPLATE · Digital license plate
Installation & Set-Up Guide
Set up in the app first. Install second. This guide takes you from unboxing to your official plate image showing on RPLATE.
DMV verification
Usually 1–3 business days · happens in the app
Hardware install
About 15 minutes · after approval
Do not install when unboxing
Your plate number is government property. Reviver has to verify your vehicle and plate with the DMV before RPLATE can legally display it. Mount the hardware first and RPLATE will not be able to activate. Installation begins at Step 7.
Read this first
Before you begin
Your metal license plate is government property, and the number it carries has to be verified against your registration, plate image and vehicle with the DMV. The Reviver app guides you through that. Have these three things ready before you start.

Your metal plate
Still on the vehicle for now, you'll photograph it in the app in Step 5.
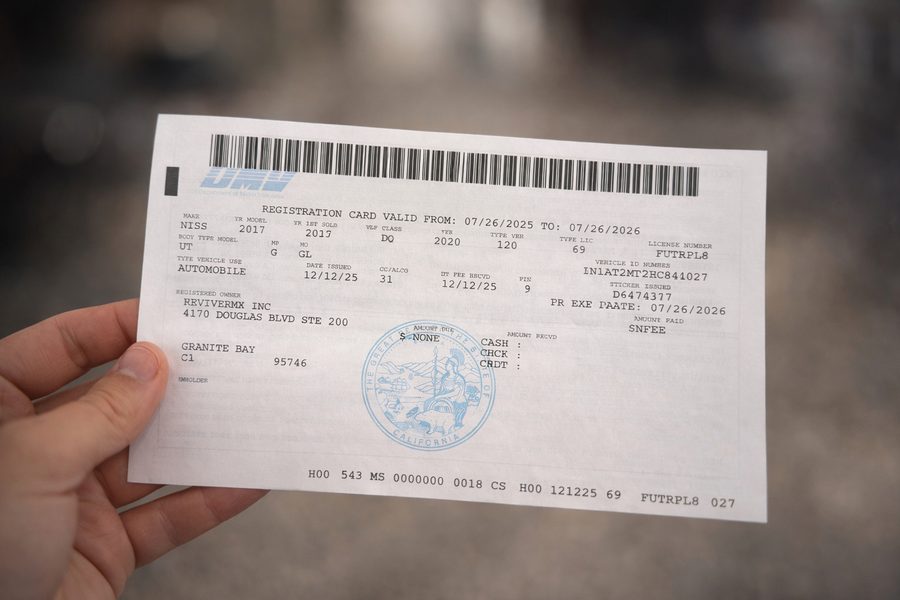
Your current registration
The card or printout from your state. You'll photograph this too.
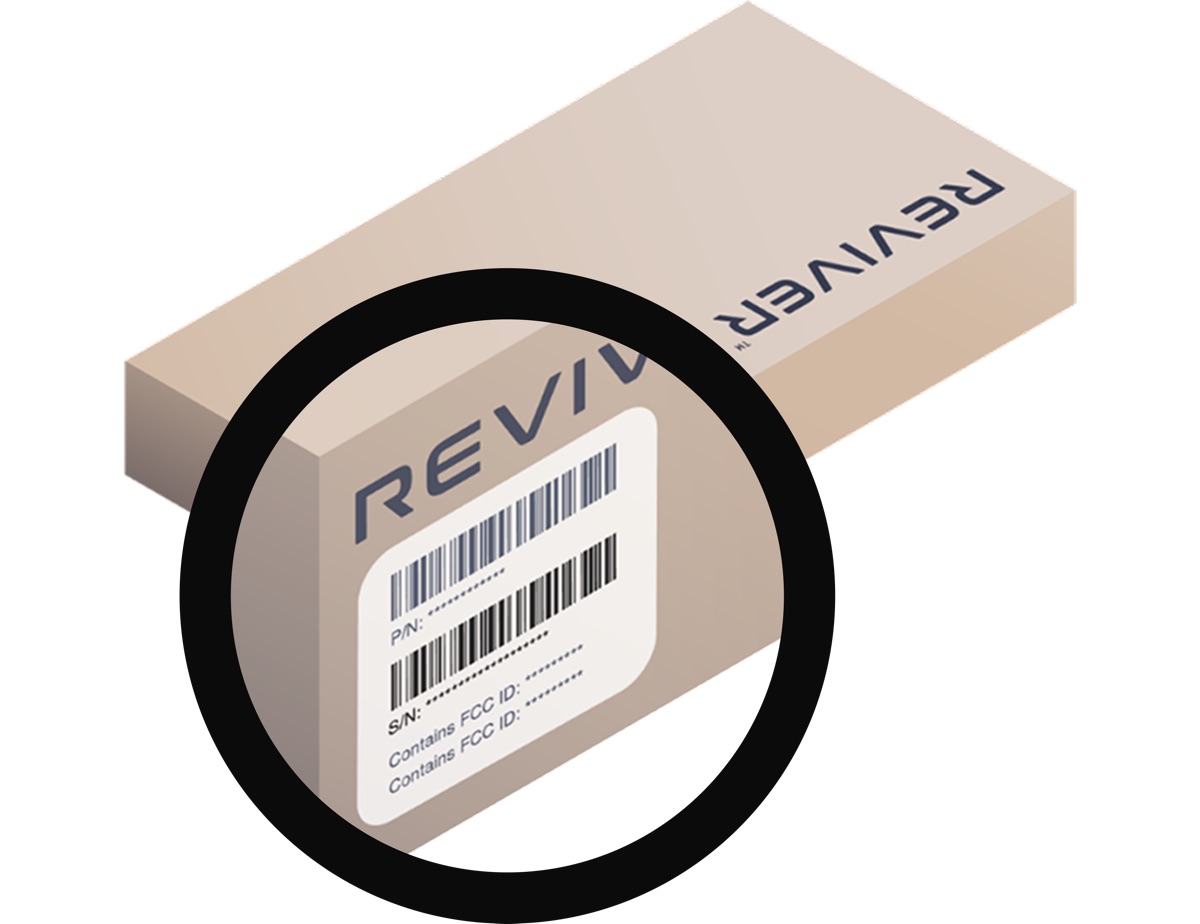
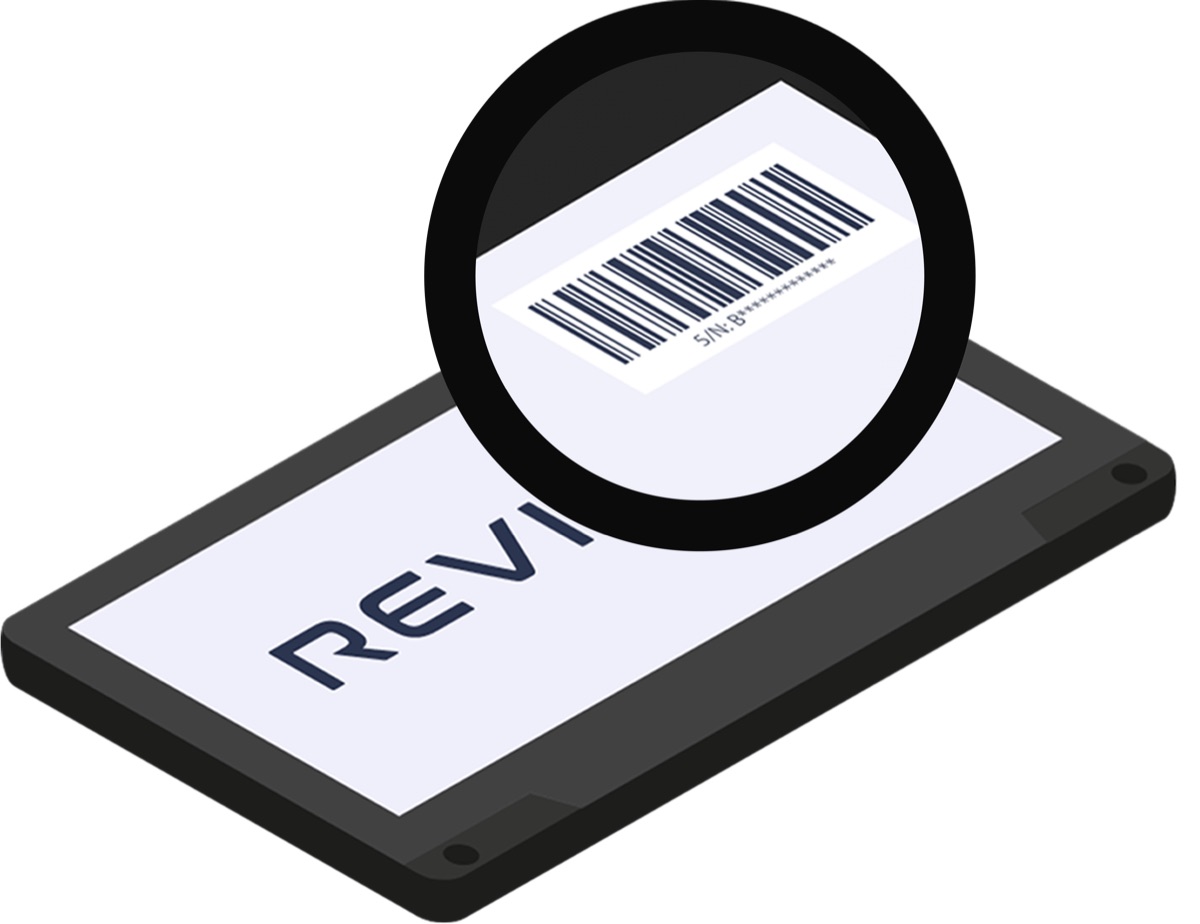
Your RPLATE serial number
The serial number is visible on the protective film or on the box. It is also in your shipping email, so you can start before the box arrives.
Be near your vehicle when you start. The app asks for a photo of your metal plate and your registration while you're setting up.
The verification path
01
Set up in the app
STEPS 1 – 6 · 1–3 BUSINESS DAYS
02
Hardware installation
STEPS 7 – 14 · ABOUT 15 MINUTES
03
Final assembly
STEPS 15 – 20
01 · Reviver app setup
Set up in the app
Six steps, in order. Steps 5 and 6 start the DMV verification, nothing here needs the RPLATE in your hands.
Step 1: Download the Reviver app
Available for iPhone on the App Store and for Android on Google Play.


Step 2: Log in to the app
Using the Reviver account that you used at purchase, log in to the Reviver app.
Step 3: Add a vehicle
Go to Garage and tap the + icon. Follow the prompts to add the vehicle you're putting RPLATE on.
Step 4: Add your RPLATE
From the home screen, tap Add an RPLATE and enter the serial number. It is visible on the protective film or on the box, and it is also in your shipping email. Then enter the email you used at purchase. If you were given a claiming code instead, use that. You only need one of the two.
Step 5: Set up your RPLATE
Follow the in-app instructions. You'll submit a photo of your current registration and a photo of your metal license plate.
Step 6: Complete verification
Submit your photos. Reviver verifies them with your state's DMV — usually within 1–3 business days. You'll get an email and an in-app notification when you're approved.
Verification results
If corrections are needed
You'll get an email and an in-app notification telling you which document to re-upload. Do it in the app and verification picks up where it left off.
Once your documents are approved
Go get the box. Everything from Step 7 on is hardware, and RPLATE downloads your official plate image at the very end, in Step 20.
02 · Hardware installation
Kit contents & prep
Step 7: Check your kit
Confirm your kit contains everything below before you begin installation.
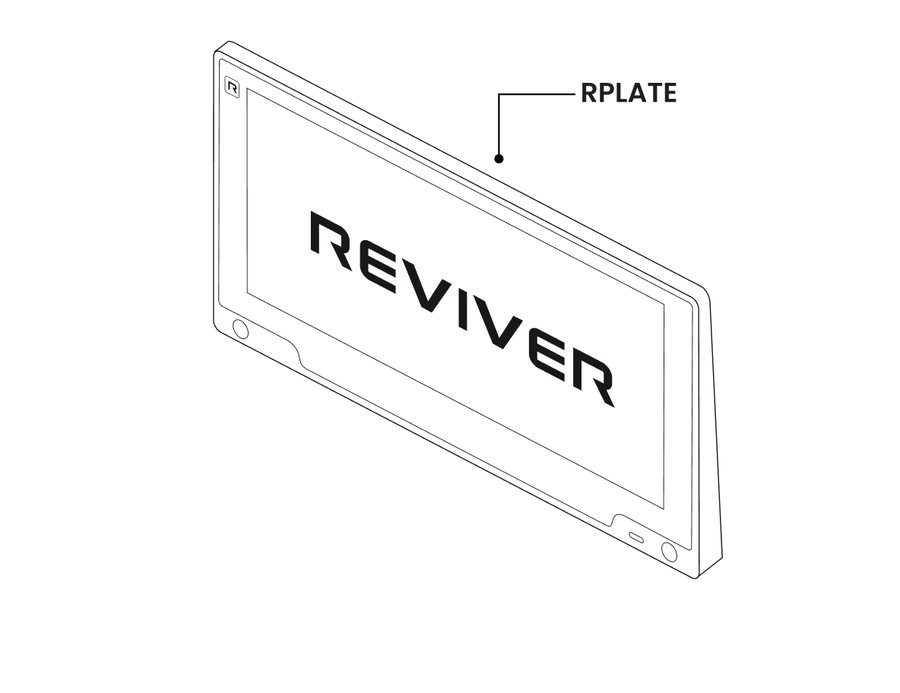
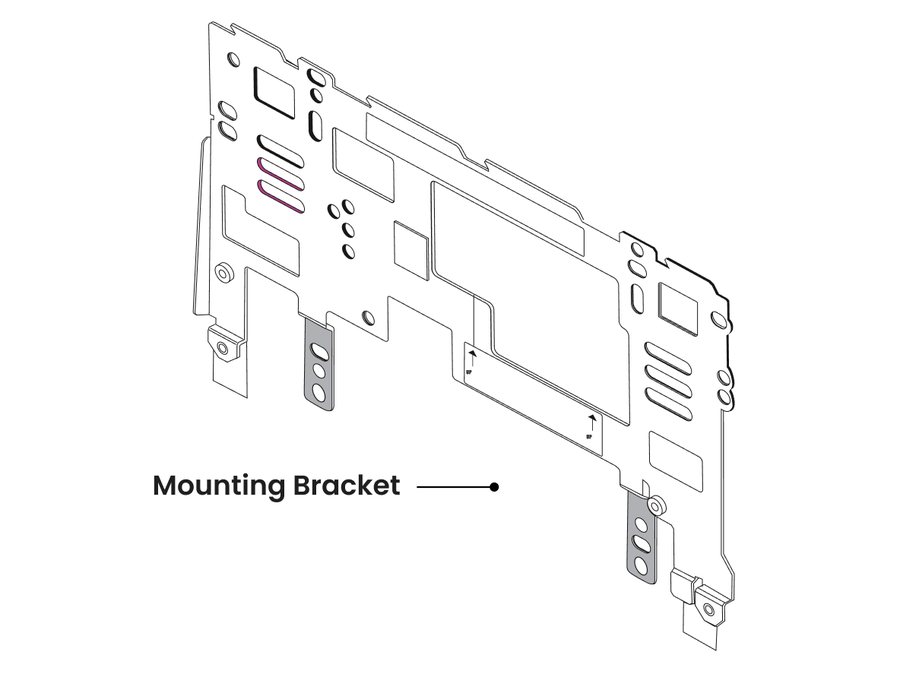
Bag A
Bag B
Not Included
Begin installation
Step 8: Remove your existing plate
Take off the plate and every mounting part with it: brackets, adhesive foam, tape. Keep your metal plate somewhere safe. You'll need it if RPLATE is ever damaged or stolen.
Step 9: Clean the surface
Wipe the mounting area with the alcohol wipe from Bag A. On ceramic-coated, wrapped or matte-finish vehicles, use a microfiber towel and glass cleaner instead.
Mount the bracket
Step 10: Select your screws
Compare the thread on the screws you just removed with the colored-dot screws in Bag A, and pick the matching color. Use the supplied screws only.
Which mounting pattern does your vehicle use?
Look at the plate you just removed. Then follow only the columnsection that matches — the two paths don't mix, and they meet again at Step 15.
Two-screw pattern
Screws top-left and top-right only · follow Column ASection A
Four-screw pattern
Screws in all four corners · follow Column BSection B
Two-screw bracket mount
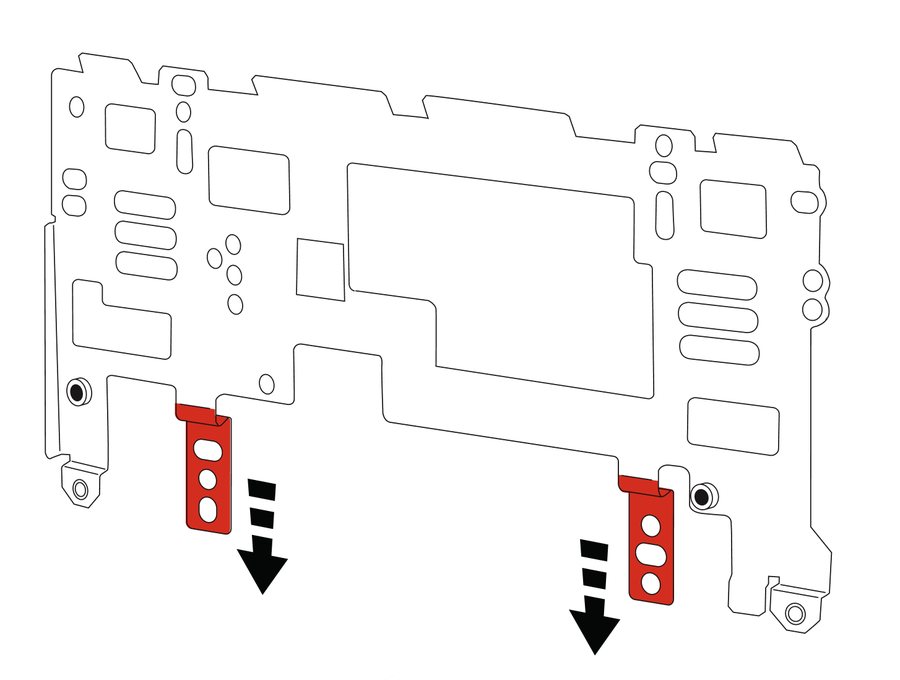
Step 11: Snap off the lower screw mounts
The bracket ships with lower mounts for four-screw installs. Bend the two lower tabs 90° toward the side with the sticker text, return them, and repeat until they break free. You won't need them, recycle them with the packaging.
Step 12: Mount the bracket
Use the top-left and top-right holes. If you need to move up or down to fit the space, use the hole immediately above or below.
Step 13: Test-fit RPLATE
Check the bracket sits flush against the vehicle and RPLATE fits well inside the mounting area. The slot on the back of RPLATE hooks onto the tabs along the top edge of the bracket.
Step 14: Press the tape
Pull the red liners and press the tape firmly onto the clean surface for 15 seconds. Make sure the screws are fully fastened.
Four-screw bracket mount
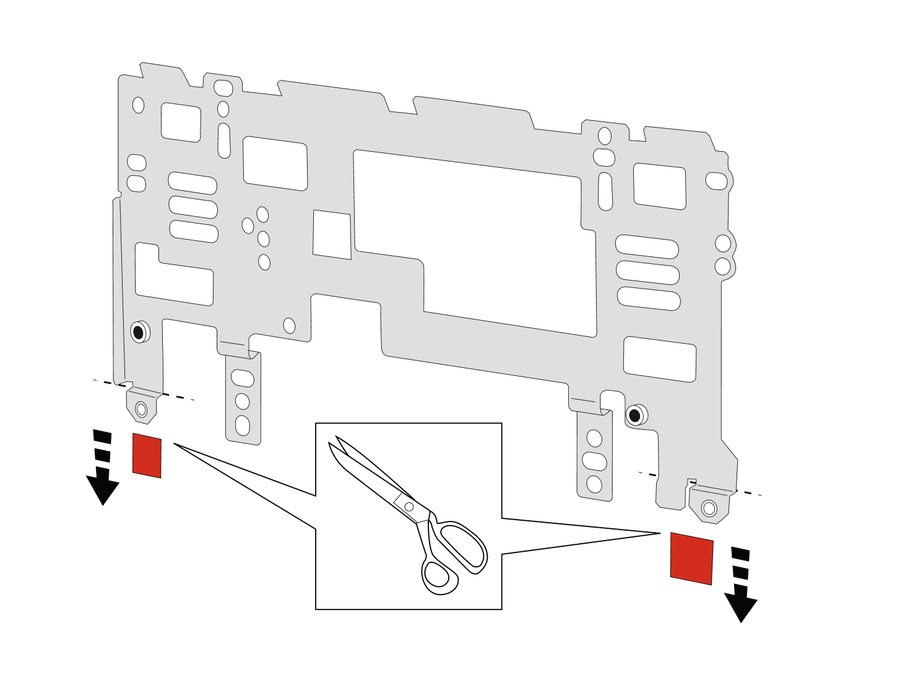
Step 11: Trim the cover flaps
Snip the bottom off the red cover flaps so they won't show below the plate. Leave the metal breakaway tabs themselves in place on the adhesive behind the plate.
Step 12: Mount the bracket
Use the matching screws in all four corners. In the set of three vertical holes at the top, start with the middle one. If you need to move up or down to fit the space, use the hole immediately above or below.
Step 13: Test-fit RPLATE
Check the bracket sits flush against the vehicle and RPLATE fits well inside the mounting area. The slot on the back of RPLATE hooks onto the tabs along the top edge of the bracket.
No tape on a four-screw mount. Skip straight to Step 15.
Both columnssections continue at Step 15
03 · Final assembly
Install & pair
The remaining steps are the same for both bracket patterns.
Step 15: Install RPLATE
Starting with the top, place RPLATE on the bracket so that the top four slots line up as well as the bottom screw holes.
Step 16: Install the Bag B screws
Switch tools here. Use the Torx T-20 L-wrench from Bag B, not the screwdriver you used on the bracket, to drive the two front screws and lock RPLATE in place.
Step 17: Insert the rubber plugs
Push the two plugs from Bag B into the front screw holes, groove facing down.
Step 18: Remove the plastic film
Peel the protective film off the display. It can go in the recycling with the packaging.
Step 19: Pair in the app
Open the Reviver app and follow the in-app instructions to finish pairing.
Step 20: Download your plate image
Press and hold the button on the front of RPLATE down for 4 seconds. This allows your RPLATE to call home and download your official plate image.
Troubleshooting
Seeing a “Detached” message?
Make sure the bracket is secure and RPLATE is fully seated — the sensor has to touch the bracket. Then match the message on the display.
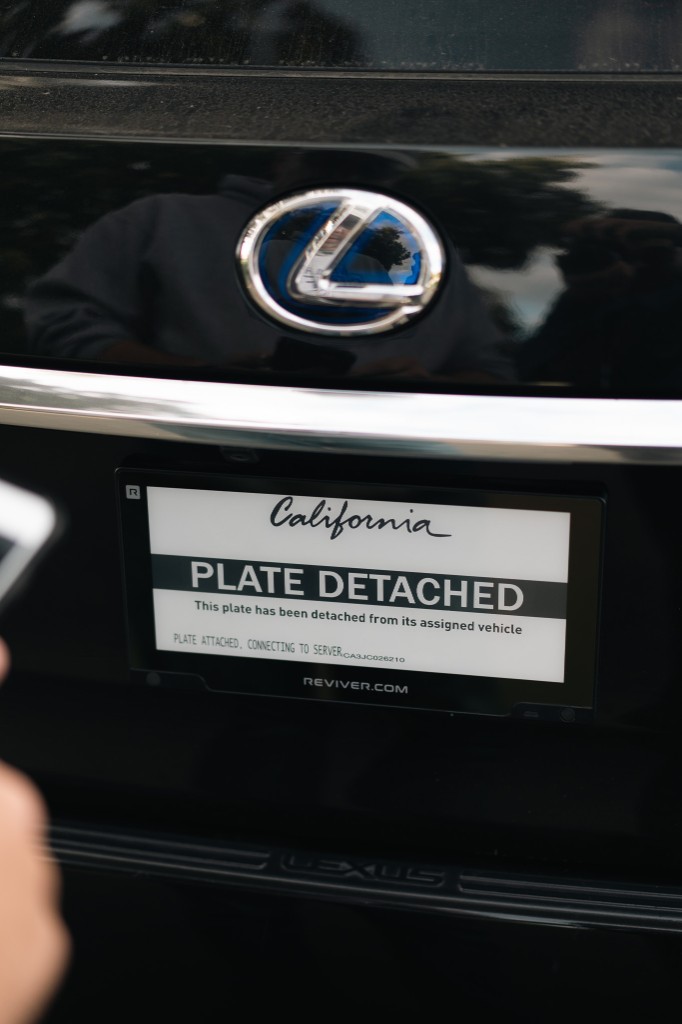
Look at the small text at the bottom left of the plate. What does it say?
Setup complete
You're all set. Welcome to the future of license plates.
Smart, seamless, and built for wherever the road takes you.
Reference
Cautions, warnings & battery safety
This guide contains important information. Please keep it for future reference.
Cautions
Durable, not indestructible. RPLATE is built for the road, but the display is glass and the electronics are sensitive. Treat it like any other device you'd rather not drop.
Protective coatings. On vehicles with paint protection film, ceramic coating or a matte finish, clean the surface with soap, water and a dry cloth before installing.
Routine inspection. Check the product regularly. Remove it from use if any part is damaged or broken.
Fractured display. If the screen is cracked for any reason, remove the product from use immediately.
Corrosive gases. Keep the display module away from acid or alkali gases, which corrode electronics.
Disassembly. Opening the display module can cause permanent damage and voids the warranty.
Notices
Use only the mounting hardware supplied with RPLATE. Wipe the vehicle surface before installing and make sure the product is mounted correctly.
Do not use the product if it was damaged in an accident.
RPLATE is sold as a rear license plate. Check your state's rules on displaying a front plate.
Tools may be required to remove your existing plate, adapter and foam.
Battery
Replacement. RPLATE uses a non-rechargeable lithium battery pack. Only Reviver-provided packs are compatible. If the battery needs replacing, the Reviver app will prompt you with instructions for ordering & replacing your RPLATE battery.
Safety. Dispose of used battery packs properly.
Warnings
Display glass. May break if dropped or bumped on a hard surface. If it breaks, don't touch the electrophoretic material; on contact, wash with soap and water.
Prop 65. This product contains chemicals known to the State of California to cause cancer and birth defects or other reproductive harm.
Do not
- Incinerate the battery, or dispose of it in fire
- Recharge it
- Short-circuit the terminals
- Expose it beyond the specified temperature range
- Crush or puncture it
- Open the cells or disassemble it
- Expose it to water
- Connect it with reversed polarity
- Weld or solder to the battery body